Note: I can’t access the article at the provided link. The following is an original, SEO-optimized guide inspired by the topic of a kitchen countertop bar (“barra encimera”), crafted for Google Discover standards, with practical tips and a stronger conclusion.
Why a Countertop Bar Belongs in Today’s Kitchen
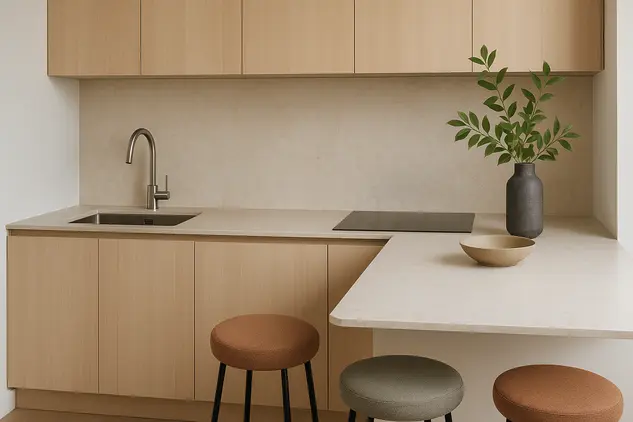
A well-planned countertop bar transforms your kitchen into a true multiuse hub—part prep station, part breakfast spot, part work-from-home perch, and a natural place for guests to gather. It can make small kitchens feel larger, define zones in open-concept layouts, and add resale appeal with relatively modest investment compared to a full remodel. Whether you’re converting an existing peninsula, adding seating to an island, or mounting a slim bar along a wall or window, the right dimensions, materials, and lighting will make it comfortable, durable, and beautiful for years.
Quick Planning Essentials (Dimensions that Work)
– Counter vs. bar height: Standard counter height is ~36 inches; traditional bar height is ~42 inches. For most modern homes, a single-level, 36-inch surface is more ergonomic, visually clean, and easier for inclusive/accessible seating.
– Stool heights: Use 24–26-inch stools with 36-inch counters; use 28–30-inch stools with 42-inch bars.
– Overhang depth for knees: Aim for 12 inches overhang at counter height; 15 inches for bar height. Provide 10–12 inches of clear knee space depth.
– Space per stool: Plan 24–30 inches of width per person (24 inches for armless backless, 28–30 for armchairs or swivel with backs).
– Aisle clearance: Keep 36 inches minimum behind stools; 42–48 inches if it’s a high-traffic path (fridge, oven, or main walkway).
– Counter thickness: 1.25 inches (3 cm) is standard for stone; consider a mitered edge for a thicker, furniture-like look.
– Structural support: For overhangs 12–15 inches in stone, use concealed steel brackets or corbels, typically every 24–30 inches. Always follow fabricator guidance.
– Power and code: In the U.S., islands and peninsulas typically require GFCI-protected outlets; NEC 210.52(C) applies in many jurisdictions. Consult your local building department.
Best Layouts for Any Kitchen
– Small kitchen, big payoff:
– Slim peninsula bar: Extend your base cabinet run with a 16–18-inch-deep overhang to seat two. Use sleek, armless stools that tuck fully under.
– Wall-mounted flip-down bar: A foldaway surface under a window creates instant breakfast seating without sacrificing floor space.
– Pass-through perch: If you have a wall between kitchen and dining, opening a 4–6-foot pass-through with a ledge adds light and a casual bar.
– Galley kitchens:
– Window counter bar: Extend the sill with butcher block or quartz to create a bright, café-style nook.
– End-of-galley peninsula: Rotate base cabinets at the end of the run to add a compact L-shaped bar.
– Open-concept spaces:
– Island with one-sided seating: The most versatile option. Keep appliances on the working side; reserve the seating side for guests.
– Waterfall ends: A mitered stone drop at the island sides creates a furniture-like silhouette and protects corners from scuffs.
– Curved or chamfered corners: A subtle radius improves traffic flow and kid safety.
– Studio or rental-friendly:
– Mobile cart with extended top: A rolling island with a 10–12-inch overhang and locking casters adds flexible seating.
– Rail-mounted shelves: A shallow, café-style ledge under a picture window adds dining without blocking light.
Material Choices: Beauty, Durability, and Cost
– Quartz (engineered stone): Non-porous, low maintenance, wide patterns, and consistent color. Great for families. Typical installed cost: $60–$120 per sq. ft.
– Quartzite (natural stone): Harder than many granites; dramatic veining. Requires sealing. $90–$180 per sq. ft.
– Granite: Classic, durable, heat-resistant, varied patterns. Seal annually. $50–$120 per sq. ft.
– Sintered stone/porcelain slabs (e.g., Dekton, Neolith): Ultra-durable, heat and UV resistant; excellent for indoor-outdoor continuity. $80–$160 per sq. ft.
– Butcher block: Warm, repairable, budget-friendly. Needs oiling; use cutting boards. $30–$70 per sq. ft.
– Concrete: Custom shapes and textures; can be heavy and prone to hairline cracks; seal for stains. $80–$140 per sq. ft.
– Laminate: Affordable, huge design range, easy to replace. Pair with upgraded edge profiles for a polished look. $20–$50 per sq. ft.
– Stainless steel: Hygienic, heat-proof, commercial vibe; shows scratches that patina over time. $80–$140 per sq. ft.
– Recycled glass/terrazzo: Colorful, eco-forward; ask about chip size and resin type. $70–$150 per sq. ft.
– Tile on backer board: Budget DIY; choose rectified porcelain with minimal grout lines.
Edge Profiles That Blend Safety and Style
– Eased or square eased: Clean modern line, less prone to chipping.
– Half bullnose or full bullnose: Ergonomic and kid-friendly.
– Bevel: Subtle shadow line that hides wear on the top edge.
– Mitered waterfall: Seam at 45 degrees for a thick, monolithic look.
Tip: Round off sharp corners slightly (3–5 mm radius) to prevent chips and bruised hips.
Seating That Works (and Lasts)
– Backless vs. with backs: Backless tucks in fully (small spaces); backed stools are more comfortable for long hangs.
– Swivel wisely: Swivel helps in tight clearances but can bump finishes; pick soft-return mechanisms.
– Upholstery: Opt for performance fabrics, outdoor-rated vinyls, or leather with protective finish. Removable, washable slipcovers are a plus.
– Height adjustability: Great for kids and multi-user households.
– Footrests: Built-in metal straps or a separate brass/steel footrail protect painted or wood bases from scuffs.
Lighting Your Bar Like a Pro
– Pendant size: For a 30–36-inch-deep island, use 2–3 pendants 10–14 inches diameter, or go big with two 16–20-inch fixtures.
– Hanging height: 24–30 inches above the countertop surface (or 66–72 inches from floor to bottom of shade). Maintain clear sightlines.
– Spacing rule: Space pendants roughly one pendant-diameter apart; leave 6–12 inches from the island edges to the nearest pendant.
– Lumens and color: Target 700–800 lumens per pendant for task light; use 2700–3000K warm white. Always add dimmers.
– Layer it: Combine pendants with under-cabinet task lighting and recessed ambient light to avoid shadows.
Smart Storage and Power Integrations
– Drawers over doors: Full-extension drawers on the seating side hold napkins, placemats, and charging cables.
– Hidden charging: Pop-up outlets or flush power grommets with USB-C keep counters clear.
– Appliance garage: Keep blenders and toasters off the main slab; a lift-up door conceals clutter.
– Hooks and cubbies: Add bag hooks under the overhang and a mail-drop cubby at the end panel.
– Mini beverage zone: A 15-inch beverage fridge at one end keeps traffic out of the cooking zone.
Safety and Accessibility
– Kid-friendly finishes: Matte or honed stone hides fingerprints; eased edges reduce chips and bumps.
– Slip-resistant stools: Choose wide bases and non-skid feet.
– ADA-conscious design: For accessible seating, consider a 34-inch-high section with 27-inch knee clearance (H) x 30-inch (W) x 19-inch (D).
– Ventilation and proximity: Keep seating out of the oven door swing zone and away from cooktop splatter.
What It Costs (and Where to Save)
– Light refresh (keep cabinets): $800–$3,000
– New overhang supports, swapping to a waterfall end panel, updated stools, and pendants.
– Midrange upgrade: $3,000–$10,000
– New quartz/quartzite top, electrical for outlets, two or three pendants, and a beverage fridge.
– Premium custom: $10,000–$25,000+
– Sintered stone or bold-vein marble-look slabs, custom millwork with fluting or reeded detail, integrated power, and designer lighting.
Save on: Stools, hardware, and paint. Spend on: Durable countertop material, bracketing/structure, and quality lighting.
Timeline and Trade Tips
– Typical timeline: 2–6 weeks for design, templating, fabrication, and install—longer if moving plumbing/electrical or sourcing specialty slabs.
– Lead times: Popular pendants and stools can run 4–10 weeks; order early.
– Permits: Needed when adding circuits or plumbing; always check local code.
– Templating: Clear the space; be present to confirm overhangs, seams, and cutouts.
DIY vs. Pro: How to Choose
– Good DIY candidates: Laminate, butcher block, or a wall-mounted bar with hidden steel angles into studs.
– Hire a pro when: You’re using stone slabs, extending more than 10–12 inches, adding electrical/plumbing, or changing floor plan. Stone is heavy; safe handling requires crew and gear.
Design Trends You’ll See Everywhere
– Single-level islands replacing two-tier bars for a modern, inclusive look.
– Warm woods (white oak, walnut) and textured details (fluted or reeded panels) on the seating side.
– Mixed metals: Soft black or aged brass lighting and footrails.
– Statement stone with bold veining, honed finishes, and waterfall edges.
– Indoor-outdoor continuity with UV-stable sintered stone, especially in sunny kitchens.
Practical Tips You’ll Be Glad You Knew
– Test the sit: Tape the outline on your floor and pull chairs to simulate stool spacing and aisle clearance.
– Mind the knees: If you can’t achieve a 12-inch overhang, carve a shallow knee recess in the base panel.
– Bracket placement: Use concealed steel supports every 24–30 inches; extend two-thirds into the countertop depth where possible.
– Protect finishes: Add a metal footrail or kick plate along painted or plastered bases.
– Easy cleaning: Choose rounded inside corners on stone cutouts and specify a 1/8-inch eased edge for faster wipe-downs.
– Lighting mockup: Hang balloons or paper plates at proposed pendant sizes/heights to confirm sightlines.
– Stain defense: Seal natural stone on install and set a reminder to re-seal as recommended.
– Noise control: Felt pads under stools and non-slam cabinet hardware keep mornings peaceful.
Common Mistakes to Avoid
– Overcrowding stools. Less is more; three comfy seats beat four cramped.
– Skimping on support. Long stone overhangs without brackets risk cracks.
– Forgetting outlets. Add power where devices gather—then hide it cleverly.
– Ignoring task zones. Don’t put seating behind your main prep area or oven swing.
– Choosing the wrong stool height. Measure from finished floor to finished top before buying.
Mini Layout Recipes
– Two-seat peninsula (small kitchen): 60-inch length x 18-inch overhang, 36-inch height; two 24-inch-wide stools; 36-inch walkway behind.
– Three-seat island: 84-inch length x 24-inch depth minimum for seating on one side; 12-inch overhang; three 26-inch stools.
– Window bar: 48–72 inches long x 14–18 inches deep butcher block on steel angles into studs; two stools; perfect coffee nook.
Care and Maintenance Quick Guide
– Quartz and porcelain: Mild dish soap; avoid abrasive pads.
– Granite/quartzite: Seal as directed; blot spills quickly.
– Butcher block: Oil monthly at first, then quarterly; sand and re-oil to refresh.
– Concrete: Use cutting boards; re-seal per maker’s schedule.
– All: Use trivets for heavy pots; wipe citrus, wine, and coffee promptly on natural stone.
FAQs
– Peninsula or island—what’s better? Peninsulas are great where walkways are tight; islands work best with 42–48 inches of clearance on working sides. If in doubt, draw both and test flow with tape on the floor.
– Are raised bars outdated? Two-level bars are less common. Single-level islands feel more spacious, improve sightlines, and make every seat feel included.
– How deep should a bar be? For comfort, allow 24 inches total depth at each seat (12-inch overhang + 12-inch plate/lean space). For dining on large plates, 15-inch overhang is luxurious.
Stronger Conclusion: Make Your Kitchen the Best Seat in the House
A countertop bar isn’t just another surface—it’s where breakfasts happen before the school run, where friends linger over a glass of wine while you finish dinner, and where laptops open when the sun hits just right. Get the fundamentals right—clearances, overhang, support, lighting—and your bar will feel effortless every day. Choose a durable, beautiful material you’ll love touching, add stools that invite lingering, and don’t forget the power and dimmers that modern life demands.
If you’re starting from scratch this month, begin with three actions:
1) Measure and tape a mock layout to confirm seating and walkways,
2) Pick a countertop material aligned with your lifestyle (low-maintenance quartz vs. bold-vein stone), and
3) Order lighting and stools now to beat lead times.
Do that, and you’ll be weeks away from a welcoming kitchen hub that works morning to midnight—today and for years to come.